Falcon NVRAM Battery replacement
Falcon NVRAM Battery replacement (the hard way) – 2011 Fox-1

Atari Falcon – NVRAM Battery 01
The MK48T87B-24 is a battery powered RAM I.C. It stores some BIOS values and also makes sure the real time clock keeps running when the computer is turned off.
After some years the battery runs flat which may cause some troubles. Too bad it can’t be replaced because it’s inaccessible.

Atari Falcon – NVRAM Battery 02
Or isn’t it?

Atari Falcon – NVRAM Battery 03
If you prefer functionality above originality it’s possible to exchange it anyways. No need to replace the whole NVRAM. It takes some time to connect another 3V source to it but it may be worth the trouble because you can use a common replacement, like a CR2032 as used on many PC boards.

Atari Falcon – NVRAM Battery 04
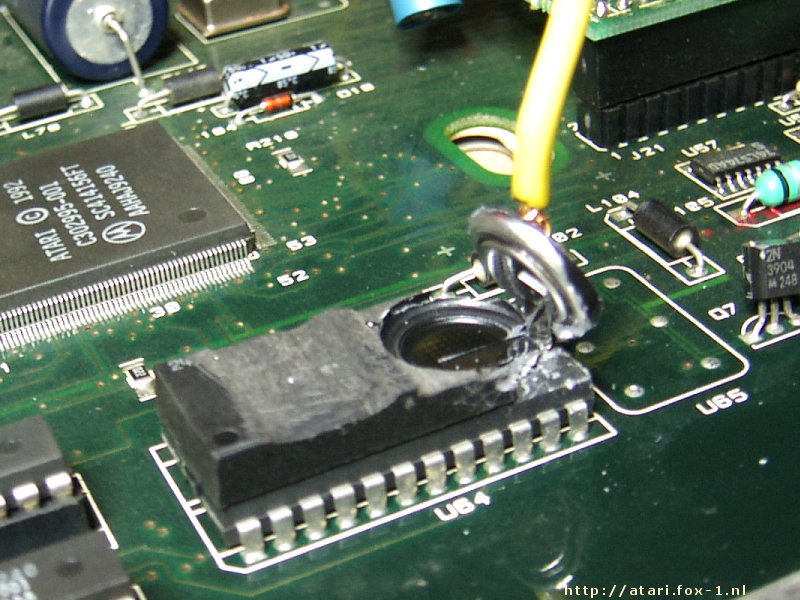
Apart for the small battery the top-half of the NVRAM holds no critical stuff. It’s located at the right side. I didn’t knew where it was and started filing at the left side. Of course, with a 50% chance it’s always the other half.

Atari Falcon – NVRAM Battery 05
When the top of the battery is completely gone, carefully remove the plastic at the sides with pliers or whatever fits the job. What is important are the two metal connections that run from the battery to the inside of the NVRAM. These are on the far right and will be needed so don’t damage those!

Atari Falcon – NVRAM Battery 06
To lift the battery I soldered a piece of fairly firm wire on the top and pulled it up a bit. Tilt it to the right because it’s still connected.
Atari Falcon – NVRAM Battery 07
In this position the connections become accessible. Cut them as close to the battery as possible. The longer the metal connections are, the easier it is to solder wires to it.
With the battery removed you can cut off the remaining plastic. A fine saw, like those to saw metal, works great for this.

Atari Falcon – NVRAM Battery 08
Now solder a wire to each connection. Make sure they’re long enough to reach the spot where you’re going to mount your new battery. Mark the polarity! The one most right is the positive one, the lower one is negative. Best is to use colored wire with red as the positive connection since it’s common.
Atari Falcon – NVRAM Battery 09
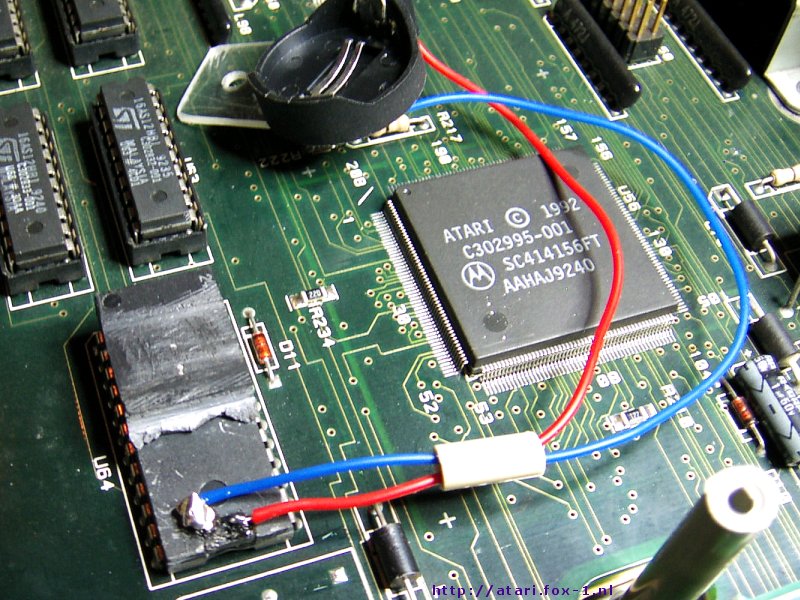
Connect the 3V battery you want to use to the other end of the wires. A clip holder to make it easy to exchange is recommended. Check the polarity once again!
You may want to put some hot glue on the connection points to lessen the stress on the wires.

Atari Falcon – NVRAM Battery 10
A place to mount the battery holder can be the edge of the power supply PCB. This way you can reuse an existing screw but basically any location will do. Just check if the keyboard has enough clearance.
With a black marker you can camouflage the result of the rough modification a bit.

Atari Falcon – NVRAM Battery 11
Loosely put together everything again and power up. Set the time/date, turn off the Falcon for a few minutes, and power up again.
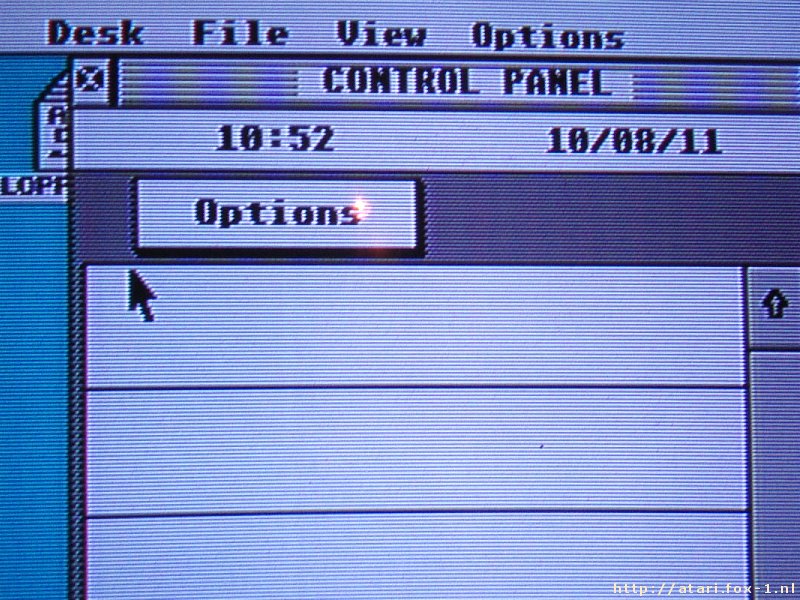
Atari Falcon – NVRAM Battery 12
If the time/date is what you’d expect you succeeded and you can put in the screws again, if those where there to begin with.
Document with above info (ODT): Atari Falcon – NVRAM Battery replacement


")
Thanks a lot for these explanations. Notice that the location of the battery on the chip seems not to be always the same. I have a first generation Falcon and the batery is smaller than on your photos and it’s located in the center of the chip.
Thanks for the info. I only have 1 Falcon and have no idea what to find in others. Your finding may be useful for someone else so it’s appreciated.